Are you interested in selling resources on TPT but don’t know where to start with resource creation? I’ve been there. When I started, I felt like I would spend HOURS creating one resource and wonder how on earth sellers got resources and content out so quickly. Eventually I realized I couldn’t go on spending that much time on an item that I would be selling for $1.00, so I started learning ALL of the PowerPoint tips and tricks to try and speed up my creation time. In this post, I am going to share some key PowerPoint tips that will get your resources noticed on TPT and cut your creation time down! Who doesn’t want time savers??? I have included text instructions AND some exclusive videos that come from my TPT Business Builder course (more updates coming VERY soon).
DESIGN TIPS:
You do not need to know how to use any fancy software to create beautiful worksheets and resources for TPT. I repeat, you do not need photoshop, illustrator, or any fancy software to make sales on TPT! The design tips below will show you how to use features of PowerPoint to create some beautiful effects for your resources.
Text Effects: Adding a Fill & Outline to a Regular Font
- Open a text box, type your title
- Highlight text, right click and select “Format Text Effects”
- Make sure the “Text Options” box is shaded in the pop-up window that appears on the right side of your screen.
- Click on the “A” with the blue box underneath it
- Click “Text Fill”
- Click “Solid Fill”
- Select your colour using the paint bucket
- Click “Text Outline” (below)
- Click “Solid Line”
- Select your colour using the pen button
- Change the width (thickness of the outline) by clicking the arrows beside “width”

Text Effects: Adding a Shadow to a Title
- Open a text box, type your title
- Highlight text, right click and select “Format Text Effects”
- Make sure the “Text Options” box is shaded in the pop-up window that appears on the right side of your screen.
- Click the A in the centre tab (with the shadow/reflection)
- Click Shadow
- Choose a colour
- Click presets to automatically change the appearance/direction of the shadow
- Customize if needed with the transparency, size, blur, angle, distance bars.

Text Effects: Layering Text
- Open a text box, type your title
- Click on the text box so that the outside is outlined
- Hit CTRL or CMD and C on your keyboard to copy
- Hit CTRL or CMD and V on your keyboard to paste
- Change the colour of one of the two identical text boxes
- Click and hold to drag them into place
- Use your keyboard to get a more precise placement for your layers.

TIME SAVERS:
The faster you create, the more resources you put up, the more products you sell. It is basic math. These next tips are my go-to’s for saving time and getting resources done quickly & efficiently!
Creating Templates
If you haven’t created templates in PowerPoint, you are missing out. PowerPoint comes equipped with templates of their own, but for TPT sellers those are usually not very helpful. Rather than going into a blank slideshow and adjusting the page size each time, changing the fonts, adding in your copyright, etc., you can actually create your own templates that are already set-up and ready for you to use!
- Go into a new blank slideshow on PowerPoint
- Adjust the page size by clicking “File” and “Page Setup”
- Select a size, or create your own by filling in the height/width you would like.
- Go ahead and add in any fonts/borders/copyright that you typically use for products and then click “File” and “Save as Template”.
- Now, when you go into PowerPoint, you can click on the “Personal” button and select your OWN template.
Templates you could create:
- Landscape 11 x 8.5 Document
- Portrait 8.5 x 11 Document
- Cover Pages (I do 25cm by 25cm)
- Credits/Thank You Document
- Pin (I do 26.45 x 39.69 for the long pins)
- Instagram Quote Post
- Preview for TPT
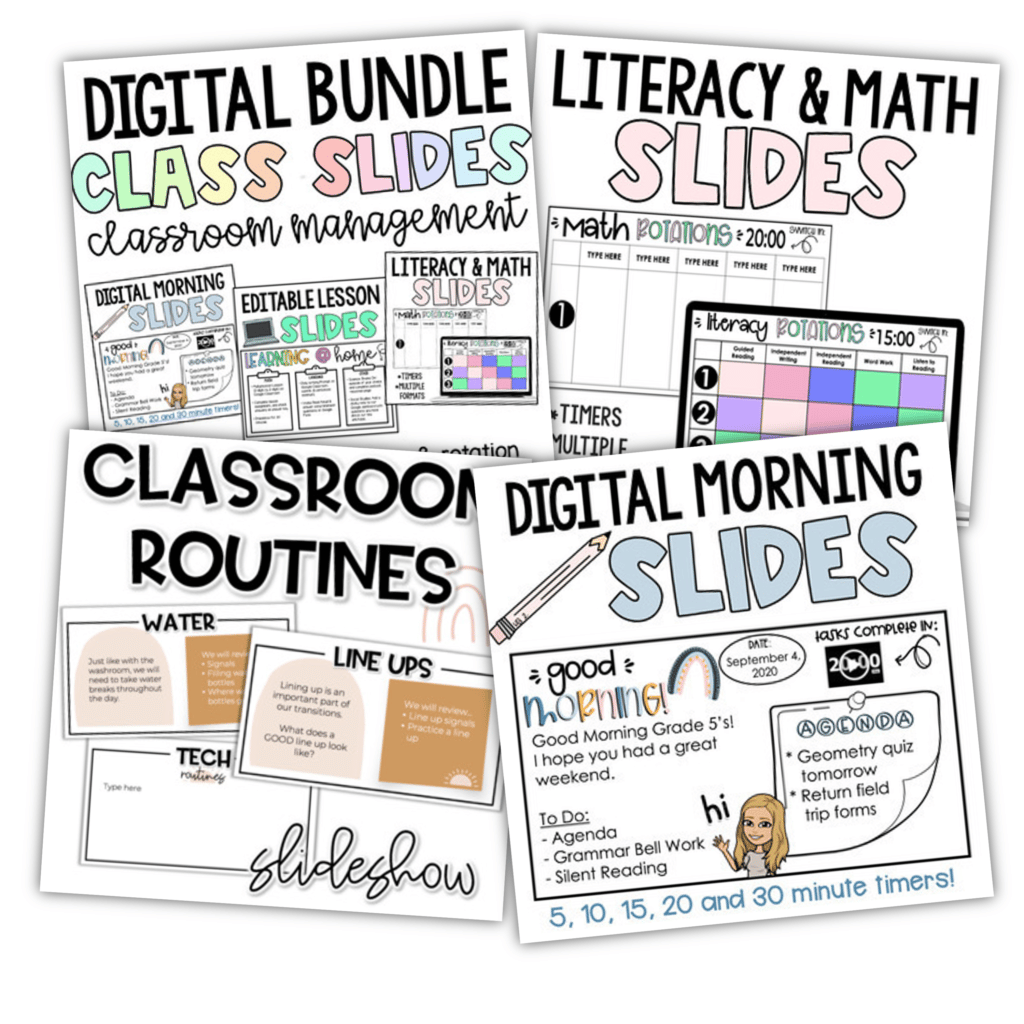
My PowerPoint Templates ↘︎

Master Slide
The master slide feature on PowerPoint is an AMAZING way to add elements onto all of your slides at once. You may use this to insert your copyright, insert a border/clipart element, have a consistent title, etc. Just remember that whatever you add to your master slide will essentially be flattened onto every slide once you go back into editing mode. For borders, this is SUPER helpful because then you don’t have to worry about the border as a layer.
- Click “View”
- Hover over “Master”
- Click “Slide Master”
- Go to the top of the slide bar on the left and make sure you are on Slide 1
- Anything you add to this slide will be automatically put onto all slides of your presentation! Borders, copyright, etc.